This is the third part of create java web service using Axis2 tutorial. In this post I'm going to create a simple client program for the web service developed in previous tutorial. Before creating this program you have to complete my previous tutorials.
Before implementing the client first we have to find the wsdl file.
First run the created project on Tomcat server. To do this right click on project select Run As then select Run on Server.
Click on Services
SelectHellowhich is your web service class name. Under Available Operations you can see your web service operation.
After clicking onHelloyou can see the WSDL file. Copy WSDL link to the clip board.
OK. We coppied the WSDL link.
Now we have to create the web service client.
Right click the web service class select New >> Other >> Web Services >> Web service Client.
Click Next. Paste link of the wsdl file to theService definitionbox.
(If you want to access the wsdl in another computer via a net work
replace "localhost" in the WSDL url with the ip address of the server machine) Make sure that the Server runtime is Tomcat
& the Web service runtime is Axis2 by clicking the links underlined
red color in the following diagram. Client type : Java Proxy
Click finish to generate Callback Handler & the Stub in same package
where the web service class exists.(If you want to change the client
package click next & give a package name to Custom package name as you wish)
Then create new class. Class name that I used is Client. Here is the project structure.
Following code shows how we can invoke the web service method using auto
generated Stub. Paste this code to newly created class. This client
class also in the same package with web service class.
package org.webapp.ws;
import org.webapp.ws.HelloStub.SayHello;

public class Client {
 public static void main(String[] args) throws Exception {
     HelloStub stub = new HelloStub();

     //Creating the request
     org.webapp.ws.HelloStub.SayHello  request = new  org.webapp.ws.HelloStub.SayHello();
     request.setName("Java web");

     //Invoking the service
     org.webapp.ws.HelloStub.SayHelloResponse response  = stub.sayHello(request);
     System.out.println("Response : " + response.get_return());
    }
}
Right click Client class and run the client as a java application.
Result :
Click here to download the complete project with client.
If you find this post helpful don't forget to leave a comment. Your comments always encourage me to write more!
This is the second part of create java web service using Axis2 tutorial. In this post I'm going to demonstrate the configuration of Apache Axis2 in Eclipse and create a simple java web service using Apache Axis2 SOAP engine. (If you want to see the first part click here.)
1. First you need to download and extract Apache Axis2 SOAP engine.
In Eclipse go to Window >> Preferences >> Web Services >> Axis2 Preferences
Then Browse to axis2 extracted location. If you configure correctly Eclipse will show this message "Axis2 runtime loaded successfully" then click on Apply button.
To set server & runtime in the same Preferences window click on Server & Runtime.
Then select Tomcat 7 as Server runtime & Axis2as Web service runtime.
To complete configurations finally click Apply and OK.
3. Creating the Dynamic web project
After completing those configurations we can directly jump in to the web
service development part. Here I'm going to implement very simple
project. You can change it as you want.
In Eclipse EE create new Dynamic web project. Give project name
- You have to select Tomcat 7 as Target runtime.
- Select 2.5 in Dynamic web module version drop down menu.
- Then click Modify... button appears just after the Configuration.
- I gave the "WebApp" as project name.
- Select Axis2 web services in opening window.
Click Finish to create the Dynamic web project.
Right click on src folder then New >> Class
- Give class name as well as package name
- I gave package name as "org.webapp.ws" and class name as "Hello"
- Then click finish to crate the class.
Add following code to the class
public class Hello {
 public String sayHello(String name) {
    return "Hello !!! " + name;
 }
}
4. Creating the web service
Right click on your service class (not the project).
Select Web Services >> Create Web Service
In Web Service window tick to the Monitor the Web service check box.
Other default settings are OK. No need to change those to this web
service.
Click Next.
Next window, select Generate a default services.xml file.
Then click Next and finally click Finish.
4. Testing the project
Perfect...... Now you should have a web service. To set the service Right click on your project and select Run As >> Run on Server.
Click next & click Finish.
If everything went fine you should see following page in Eclipse internal web browser.
Click here to download the project.
In my next post I hope to demonstrate the implementation of the client program.
If you find this post helpful don't forget to leave a comment. Your comments always encourage me to write more!
This series of tutorials will explain how to create a simple java web
service in Eclipse using Axis2. Finally I hope to create a client
program for the web service.
This is the part 01.
Here I'm going to explain how we can configure Tomcat 7 for Eclipse 4.2 (Juno) because before create a java web service we need to setup development
environment and configure the server. Here I use Tomcat 7 server
for this tutorial.
1. Setup the development environment.
To setup the development environment you need to download and extract Eclipse EE and Tomcat servlet container.
1. Eclipse IDE for Java EE Developers - Download 2. Apache Tomcat (Download zip archive not the windows service installer) - Download.
2. Here is the steps to configure Tomcat 7 in eclipse 2.1 Double click to open Eclipse. You should be able to see the Servers tab.
If you can't see the Servers tab then ; Window >> Show View and select Servers
2.2 Right click on Servers tab Select ; New >> Server
Then from the new server window select ; Apache >> Tomcat v7.0 Server and click next
In next window browse to extracted Tomcat files, that is Tomcat installation directory and select the jre that installed in your system and click finish to create the new server.
2.3 To start the server right click on Tomcatv7 server in Servers tab and select Start.
2.4 To check the server open Chrome and go to localhost:8080 you should be able to see Tomcat start page.
If you are getting "requested resource is not available" error you need to change the file location of the Tomcat.
In order to do that right click on server in the Servers tab and select properties. Then from the server properties window click Switch Location and Apply , OK.
Next double click on the server to open Overview.
In the Overview window change Server locations to Use Tomcat installation and save changes. (If you want you can change ports from the Overview window).
Restart the server and check. Now you should be able to see the default start page.
To open Eclipse Internal web browser select ; Window >> Show View >> Other >> General >> Internal web Browser
PART 02 (Configuration of Axis2 and creating simple web service) Thanks! Post your ideas.
Here is a quick example on FULL JOIN in MySQL database.
FULL JOIN concept in MySQL is to return rows when there is a match in one of the tables. Further FULL JOIN or FULL OUTER JOIN is UNION of LEFT JOIN and the RIGHT JOIN of the both tables.
Consider that you have following two tables.
Table 1 : Persons
Eg : queries to create and populate the Persons table.
Now think that we want to join rows of both these tables on the condition of same P_Id. To perform that we need to get the UNION of RIGHT JOIN and the LEFT JOIN of both tables.
Here is the query to FULL JOIN operation.
SELECT Persons.Name, Persons.P_Id, Invoice.Id
FROM Persons
LEFT JOIN Invoice
  ON Persons.P_Id=Invoice.P_Id
UNION
SELECT Persons.Name, Persons.P_Id, Invoice.Id
FROM Persons
RIGHT JOIN Invoice
  ON Persons.P_Id=Invoice.P_Id
Resulting table :
I think that you can understand what happened here.
3. UNION of these two tables means rows when there is a match in one of the tables or FULL JOIN of these two tables.
If you understand the concept try to use following query to FULL JOIN these tables. Same concept and same result.
SELECT Persons.Name, Persons.P_Id, Invoice.Id
FROM Persons
LEFT JOIN Invoice
  ON Persons.P_Id=Invoice.P_Id
UNION
SELECT Persons.Name, Persons.P_Id, Invoice.Id
FROM Invoice
LEFT JOIN Persons
  ON Persons.P_Id=Invoice.P_Id
Thank you for watching. Always your ideas are welcome.
Happy coding!
There is a simple method to make a restrict or a limit on allowed characters in Android edit text field.
Eg: Suppose that you want to make a restrict where user only allows to type a,e,i,o,u. You can easily do this by using following line in your layout.xml file
Some times Eclipse default internal web browser will not work in your Ubuntu environment. Is that the case, you need to install webkit library for Ubuntu.
In order to install webkit libraries got to your terminal and run this command.
sudo apt-get install libwebkitgtk-1.0-0
This may take a while.
After finishing the installation you should be able to open Eclipse internal web browser.
Window >> Show View >> Other >> General >> Internal Web Browser.
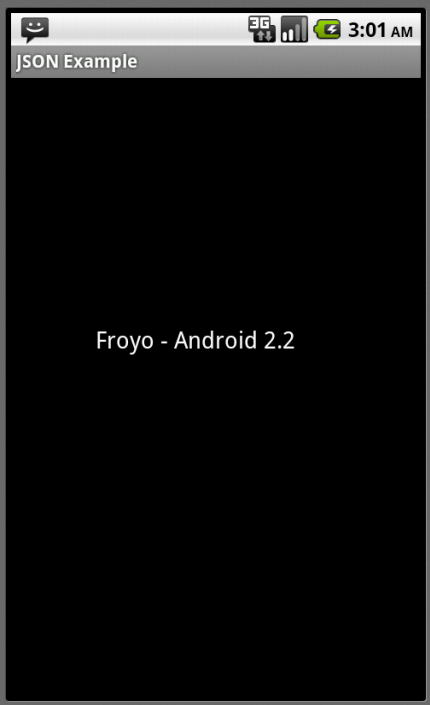
Now let's see simple example of JSON reading in Android.
In my project there is a PHP web service which encodes a string array in to JSON format. I'm going to access that web service using Android http client and then it decodes json data. I have tested this on Android 2.2
Once I needed to display an image loading from URL in my Android application. After referring some resources I was success. Here I post what I did. This is for future references. I did this for Android 2.2 platform.
This Android application load an image from a server using HttpURLConnection and show it in image view when you click load image button.
(I have used image located here http://www.codeincloud.tk/play.png)
1. A MySQL database which holds user name and password.
2. A java web service deployed on Tomcat server.
3.Android application to access the database through the java web service to verify the user.
1. Databse
First we have to create a database and table to store user information. To create the database I used MySQL command line client. (If you like you can use phpmyadmin it is easier)
In order to create the database, a table and to populate the database run following queries.
a. Create the database
CREATE DATABSE androidlogin;
b. Select the database
USE androidlogin;
c. Create a table
CREATE TABLE user(
username VARCHAR(20) NOT NULL,
password VARCHAR(20) NOT NULL);
d.Populate the database
INSERT INTO user(username,password)
VALUES('admin','123');
2. Java webservice
Create the java web service in Eclipse. Follow the steps mentioned here. Additionally you have to import JDBC connector to the web service project.
Here is the content for java web service.
package com.userlogin.ws;

import java.sql.Connection;
import java.sql.DriverManager;
import java.sql.PreparedStatement;
import java.sql.ResultSet;

public class Login {
 public String authentication(String userName,String password){

  String retrievedUserName = "";
  String retrievedPassword = "";
  String status = "";
  try{

   Class.forName("com.mysql.jdbc.Driver");
   Connection con = DriverManager.getConnection("jdbc:mysql://localhost:3306/androidlogin","root","chathura");
   PreparedStatement statement =  con.prepareStatement("SELECT * FROM user WHERE username = '"+userName+"'");
   ResultSet result = statement.executeQuery();

   while(result.next()){
    retrievedUserName = result.getString("username");
    retrievedPassword = result.getString("password");
    }

   if(retrievedUserName.equals(userName)&&retrievedPassword.equals(password)){
    status = "Success!";
   }

   else{
    status = "Login fail!!!";
   }

  }
  catch(Exception e){
   e.printStackTrace();
  }
  return status;

 }

}
> For more details read my first post.
> "root" and "chathura" in line 17 are user and the password of the database. You need to change those according to your settings.
3. Android application.
a. Code for main activity
package com.androidlogin.ws;

import org.ksoap2.SoapEnvelope;
import org.ksoap2.serialization.PropertyInfo;
import org.ksoap2.serialization.SoapObject;
import org.ksoap2.serialization.SoapPrimitive;
import org.ksoap2.serialization.SoapSerializationEnvelope;
import org.ksoap2.transport.HttpTransportSE;
import android.app.Activity;
import android.os.Bundle;
import android.view.View;
import android.widget.Button;
import android.widget.EditText;
import android.widget.TextView;

public class AndroidLoginExampleActivity extends Activity {
 private final String NAMESPACE = "http://ws.userlogin.com";
    private final String URL = "http://111.223.128.10:8085/AndroidLogin/services/Login?wsdl";
    private final String SOAP_ACTION = "http://ws.userlogin.com/authentication";
    private final String METHOD_NAME = "authentication";
    /** Called when the activity is first created. */
    @Override
    public void onCreate(Bundle savedInstanceState) {
        super.onCreate(savedInstanceState);
        setContentView(R.layout.main);
        Button login = (Button) findViewById(R.id.btn_login);
        login.setOnClickListener(new View.OnClickListener() {

   public void onClick(View arg0) {
    loginAction();

   }
  });
    }

    private void loginAction(){
     SoapObject request = new SoapObject(NAMESPACE, METHOD_NAME);

        EditText userName = (EditText) findViewById(R.id.tf_userName);
        String user_Name = userName.getText().toString();
        EditText userPassword = (EditText) findViewById(R.id.tf_password);
        String user_Password = userPassword.getText().toString();

      //Pass value for userName variable of the web service
        PropertyInfo unameProp =new PropertyInfo();
        unameProp.setName("userName");//Define the variable name in the web service method
        unameProp.setValue(user_Name);//set value for userName variable
        unameProp.setType(String.class);//Define the type of the variable
        request.addProperty(unameProp);//Pass properties to the variable

      //Pass value for Password variable of the web service
        PropertyInfo passwordProp =new PropertyInfo();
        passwordProp.setName("password");
        passwordProp.setValue(user_Password);
        passwordProp.setType(String.class);
        request.addProperty(passwordProp);

        SoapSerializationEnvelope envelope = new SoapSerializationEnvelope(SoapEnvelope.VER11);
        envelope.setOutputSoapObject(request);
        HttpTransportSE androidHttpTransport = new HttpTransportSE(URL);

        try{
            androidHttpTransport.call(SOAP_ACTION, envelope);
               SoapPrimitive response = (SoapPrimitive)envelope.getResponse();

               TextView result = (TextView) findViewById(R.id.tv_status);
               result.setText(response.toString());

        }
        catch(Exception e){

        }
       }

}
> You need to import ksoap2 library for the Android project.
> You cannot access the URL in above code because the web service is deployed in Tomcat server installed in my computer not in a cloud server therefore you have to replace that with an URL for your own web service.
> For more details check these posts. 1. Post 1 2. Post 2
b. Content of main.xml
c. You need to add internet permission to the project
Manifest.xml
You can download Android project here
(After downloading the project first remove imported ksoap2 library from the project and re import ksoap2 from your hard disk )
My first tutorial Android MySQL client is about read data from a MySQL database. Here I'm going to insert data to MySQL database using an Android program. Concept is same as before (Before start test this read first tutorial.)
Program has three main parts.
1. Database (MySQL)
2. Java web service.
3. Android application.
Java web service deployed on Tomcat server has a method which accepts two values and it runs a quarry on database to insert data & also this method returns a string.
The Android application calls that web service method remotely with two values using ksoap library. Then web service runs a query on database table and inserts data
1. First create the database and table.
CREATE DATABASE login;
USE login;
CREATE TABLE users(
name varchar(20),
password  varchar(20)
);
2. Then create the web service
Here is the content of my web service
import java.sql.Connection;
import java.sql.DriverManager;
import java.sql.PreparedStatement;

public class Users {

 public String insertData(String userName,String userPassword){

  try{

   Class.forName("com.mysql.jdbc.Driver");
   Connection con = DriverManager.getConnection("jdbc:mysql://localhost:3306/login","root","chathura");
   PreparedStatement statement =  con.prepareStatement("INSERT INTO users(name,password) VALUES ('"+userName+"','"+userPassword+"');");
   int result = statement.executeUpdate();
  }

   catch(Exception exc){
    System.out.println(exc.getMessage());
    }

  return "Insertion successfull!!";
  }

}
In line 12 root and chathura are user and the password. Change those with your username and the password.
This java web service has JDBC connector to access the database. Click here to download the connector.Import JDBC connector to your project. This tutorial is about importing the ksaop library. In the same way you can import JDBC library also. It is simple
You can implement the web service easily by following my these posts. 1. Create java web service in Eclipse using Axis2 (Part 01) 2. Create java web service in Eclipse using Axis2 (Part 02)
3. Android application.
The Android application uses ksoap2 library to access java web service. You can find More details about implementation of Android client applications from here. If you are planning to use new Android version read this tutorial.
Here is the code for Android application.
You need to change name space, url, soap action and method name according to your web service.
import org.ksoap2.SoapEnvelope;
import org.ksoap2.serialization.PropertyInfo;
import org.ksoap2.serialization.SoapObject;
import org.ksoap2.serialization.SoapPrimitive;
import org.ksoap2.serialization.SoapSerializationEnvelope;
import org.ksoap2.transport.HttpTransportSE;
import android.app.Activity;
import android.os.Bundle;
import android.view.View;
import android.widget.Button;
import android.widget.EditText;
import android.widget.TextView;

public class AndroidMySQLClientActivity extends Activity{
    private final String NAMESPACE = "http://ws.login.com";
    private final String URL = "http://175.157.3.42:8085/InsertToUsers/services/Users?wsdl";
    private final String SOAP_ACTION = "http://ws.login.com/insertData";
    private final String METHOD_NAME = "insertData";
    Button btninsert;
    /** Called when the activity is first created. */
    @Override
    public void onCreate(Bundle savedInstanceState) {
        super.onCreate(savedInstanceState);
        setContentView(R.layout.main);

        btninsert = (Button)findViewById(R.id.btn_insert);
        btninsert.setOnClickListener(new View.OnClickListener() {
            public void onClick(View v) {
             insertValues();
            }
        });
    }

    public void insertValues(){
     SoapObject request = new SoapObject(NAMESPACE, METHOD_NAME);
     EditText userName = (EditText) findViewById(R.id.editText1);
     String user_Name = userName.getText().toString();
     EditText userPassword = (EditText) findViewById(R.id.editText2);
     String user_Password = userPassword.getText().toString();

     //Pass value for userName variable of the web service
        PropertyInfo unameProp =new PropertyInfo();
        unameProp.setName("userName");//Define the variable name in the web service method
        unameProp.setValue(user_Name);//Define value for fname variable
        unameProp.setType(String.class);//Define the type of the variable
        request.addProperty(unameProp);//Pass properties to the variable

      //Pass value for userPassword variable of the web service
        PropertyInfo passwordProp =new PropertyInfo();
        passwordProp.setName("userPassword");
        passwordProp.setValue(user_Password);
        passwordProp.setType(String.class);
        request.addProperty(passwordProp);

        SoapSerializationEnvelope envelope = new SoapSerializationEnvelope(SoapEnvelope.VER11);
        envelope.setOutputSoapObject(request);
        HttpTransportSE androidHttpTransport = new HttpTransportSE(URL);

        try{
         androidHttpTransport.call(SOAP_ACTION, envelope);
            SoapPrimitive response = (SoapPrimitive)envelope.getResponse();

            TextView result = (TextView) findViewById(R.id.textView2);
            result.setText(response.toString());

     }
     catch(Exception e){

     }
    }

}
4.Code for main.xml file
5. Content of the Manifest.xml (Add internet permission)
Note : Click here to download the Android project.
Do you think this is helpful ? Please write your ideas :)
In this post I'm going to show you how we can access a very simple php web service from an Android application.
You can host your web service on wamp server installed in your machine or you can simply use a cloud server like 000webhost.
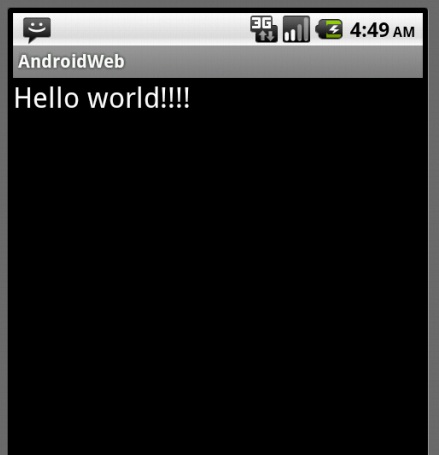
1. To keep things simple I'm going to use a dummy php code as follows <?php
echo "Hello world!!!!"
?>
Create this php file and copy it in to www directory of wamp server or upload it in to a cloud server.
2. Here is the code for Android activity
import android.app.Activity;
import android.os.Bundle;
import java.io.IOException;
import android.widget.TextView;
import org.apache.http.HttpResponse;
import org.apache.http.client.HttpClient;
import org.apache.http.client.methods.HttpPost;
import org.apache.http.impl.client.DefaultHttpClient;
import org.apache.http.util.EntityUtils;

public class AndroidWebActivity extends Activity {
    /** Called when the activity is first created. */
    @Override
    public void onCreate(Bundle savedInstanceState) {
        super.onCreate(savedInstanceState);
        setContentView(R.layout.main);
        HttpClient httpclient = new DefaultHttpClient();
        HttpPost httppost = new HttpPost("http://www.codeincloud.tk/First.php");
        try {
           HttpResponse response = httpclient.execute(httppost);
           final String str =  EntityUtils.toString(response.getEntity());
           TextView tv = (TextView) findViewById(R.id.textView1);
           tv.setText(str);
        }
       catch (IOException e) {
           // TODO Auto-generated catch block
           e.printStackTrace();
        }
    }
}
Note : If you are using wamp server don't use local host for the url in line 18, use 10.0.2.2. Eg: http://10.0.2.2/android_connect/first.php
Don't forget to add internet permission.
Output of the program :
This tutorial demonstrate how we can implement a simple Android application which can send SMS. To check this application I used two emulators. If you are planning to use emulator to check this you need to create two emulators first. I have tested this using Android 2.2 two emulators.
1. First create two emulators
One should be emulator-5554 and the other one should be emulator-5556
2. Here is the Activity code for send SMS using intent.
import android.app.Activity;
import android.content.Intent;
import android.net.Uri;
import android.os.Bundle;
public class TestSMSActivity extends Activity {
    /** Called when the activity is first created. */
    @Override
    public void onCreate(Bundle savedInstanceState) {
        super.onCreate(savedInstanceState);
        setContentView(R.layout.main);
        String number = "5556";
        startActivity(new Intent(Intent.ACTION_VIEW, Uri.fromParts("sms", number, null)));
    }
}
The variable "number" in line 11 is the the recipient of the SMS activity. I'm going test this application using two emulators therefore I used one emulator number for that variable. If you are going to send SMS to mobile phone replace number with mobile phone number, but remember that sending SMS from emulator to a cell phone is difficult.
Don't forget to add send SMS permission to your Manifest file.
3. Run the project.
Android device chooser window will appear. Choose an AVD. If you assigned 5556 to number variable then choose emulator-5554 to run program, other vice select emulator-5554.
Then compose message window will open. Type a simple text (Eg:-"Hello world!") there and click on send.


